

This was our first time making them and I was planning to healthify them a bit, so I was a little nervous they might not turn out right. Fortunately, when we popped them out of their corn husk skins, they looked and tasted great.


Making tamales is not hard, but it is time intensive, so make sure you have time to be in the kitchen for a while. We enjoyed the process, though. We had a house full of people, good music on the stereo, snacks to nibble on, and Coronas to sip, so it was a fun afternoon.


Start by soaking your corn husks. We found a huge package of corn husks right in the produce section of ShopRite, and they were only a couple bucks for the whole thing. The husks need to soak for about 30 minutes so they are pliable. You might also want to check for any dirt or bugs...I found one.

I soaked the corn husks in my giant canning steamer, but a bowl of water will work just fine.
Now for the masa flour. There are actually two kinds of masa flour - one that is only for tamales, and one that can be used for tamales, tortillas and other Mexican meals. There happened to be a Mexican woman standing next to me in the grocery store and she was watching me try to make a decision, so I asked for her opinion on the matter. So cliche of me, I know. But she was a big help! She said the tamale masa flour is a little more fine and should only be used for tamales; the other flour works just as well for tamales, but is more versatile. We like versatile, so I bought the multi-purpose flour.

The masa should be the consistency of thick peanut butter, but nearly all the recipes I read called for a ton of butter or oil (um, two CUPS of oil) to achieve this. I really wanted to create a masa that was creamy and flavorful but without all that fat, and I think we've got a winner on our hands. I used just a little bit of oil, and then added lots of spices to give it more flavor.


Next up is the filling. I looked at a bunch of different tamale recipes, and came to the conclusion that the masa is really just a canvas for whatever fillings you want to use. I saw recipes for all different kinds of both savory and sweet tamales, so if this filling isn't for you, just stuff your husks with whatever you like.
I like veggies and cheese, so that's what I used.

Matt likes chicken, so that's what he used. He coated some chicken breasts with sazon seasoning, then baked them in the oven and chopped them into chunks. If we'd thought ahead, he would've thrown the chicken in the crockpot in the morning so he could have shredded it. Next time.

After the fillings are cooked, it's stuffing time! I found it easiest to make a "stuffing station" with everything I needed right in a row.

In addition to the corn husks, masa, filling and cheese, you'll need something to tie the tamales with. You can use kitchen string, or just take a few of the husks and tear them up into 1/2 inch strips. I think these look prettier, and I didn't have any string, so husk strips were my tie of choice.

It's helpful to roll the tamales on a kitchen towel since they'll be wet when you take them out of the soaking bowl. Take 2-3 tablespoons of the masa and spread it in the center of the tamale, leaving a narrow border on each side and a good amount of room at the top and bottom of the corn husk. Use your fingers to pat the masa down and spread it out. Then spoon about 1 tablespoon of the filling on top of the masa and top with a sprinkling of cheese. Resist the temptation to overfill! I broke a couple husks trying to stuff them with too much of the filling.

There are two different rolling methods. I made mine into little packages, which I actually think was the easiest way. It's like folding a burrito.
First fold in the sides:

Then fold up the bottom:

Then the top:

Then flip your package over and put a tie underneath:

And tie it off!

This filling and wrapping process is pretty time intensive, but that's what the beer is for.

You can also wrap your tamales by just folding in each side (like step 1 above), and then twisting each end and tying them. Matt used this method for the chicken tamales so we could tell which ones had meat and which ones were veggie.

I got into a little rhythm and it was actually kind of relaxing. Once all the tamales are stuffed and tied, into the steamer they go. (Note: You can also make these ahead, and at this point throw them into the freezer. Then just pull them out and put them into the steamer when you want them).

I don't have a tamale steamer (shocker), so I used my canning steamer. If you don't have a canner, you can just use a large pot with either a steamer basket or a colander. Matt used the steamer basket method for his chicken tamales. Just pack 'em in tightly and they're good to go.
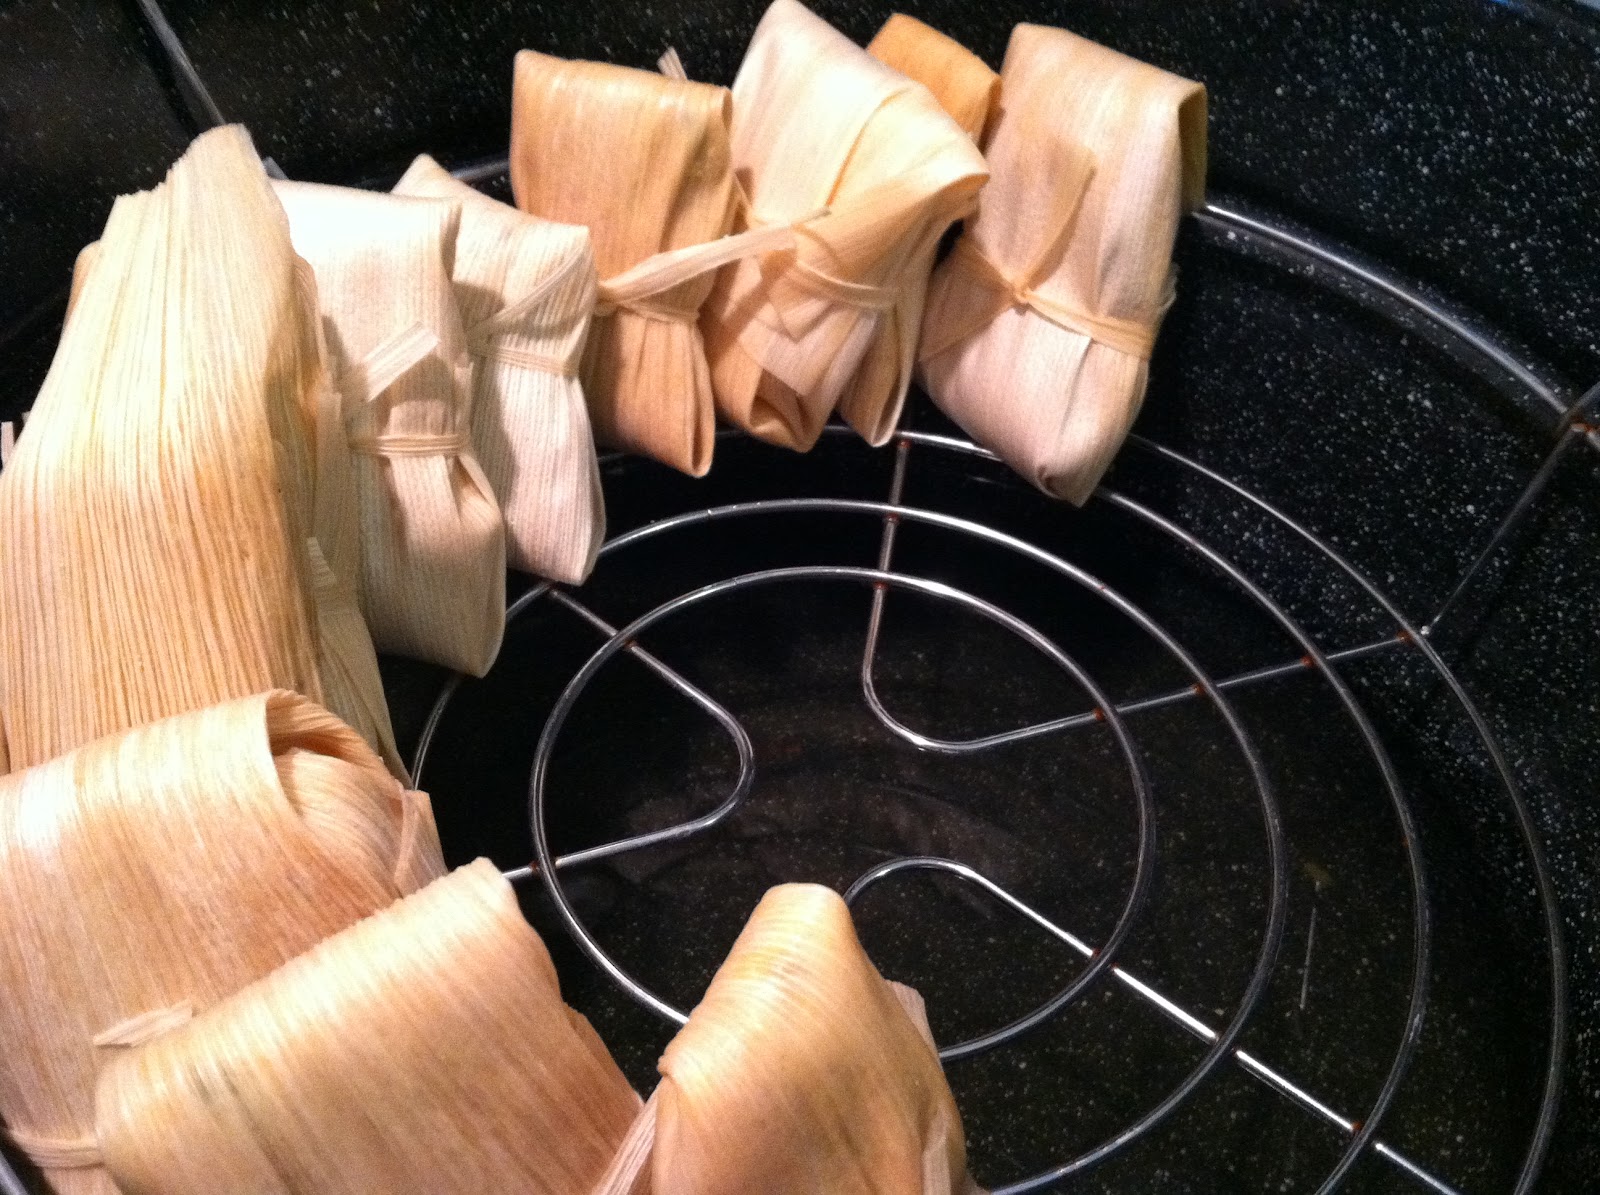
You basically just want to make sure the tamales do not touch the water and that your pot never gets dry. If we're being honest here, both those things happened to us on one of the batches. Luckily we saved them in time and they turned out fine, so if that happens to you, have no fear! Just keep going. Keep an eye on the tamales while they cook, and if you notice there isn't much steam coming up (or smell the pot burning, like uh, we did), it means you need to add more water. Just remove the tamales with a tong, add more water to the pot, and put the tamales back in.
They need to steam for an hour or more. After about an hour, open one up and check if the masa is done - it should be firm but not hard, kind of like polenta. While they're steaming, you have a chance to drink another Corona and make some rice and beans to serve with the tamales.
Once they're done, pile them up onto a big platter, family style. I love the look of this!

We served the tamales with rice and black beans, some blue corn tortilla chips, sour cream, salsa, and fresh lime. The fresh lime sends the flavor over the top, I highly recommend it! I also made a huge green salad, which barely got touched. The tamales were the star of the show.
 |
| Husk On |
 |
| Husk Off |

One final note: The recipe below makes about 16 veggie tamales. We doubled the masa recipe so we could make 16 veggie tamales and 16 chicken ones. Matt used 4-5 chopped chicken breasts to make 16 chicken tamales.
Veggie Tamales
(Loosely based on this recipe from Tasty Kitchen)
Makes about 16 tamales
Ingredients
1 package corn husks (they usually come in packages of 40-50, but you will only need 16-20 husks)
4 oz. cheddar cheese, shredded
Masa
2 cups masa flour
1/4 tsp. salt
1 tsp. chili powder
1/2 tsp. paprika
1 tsp. garlic powder
1/4 tsp. cayenne pepper
1 tsp. cumin
2 1/2 cups water or vegetable broth
1 Tbsp. canola oil
Filling
1 Tbsp. olive oil
1 onion, sliced
3/4 tsp. salt
2 cloves garlic, minced
2 zucchinis, chopped
1 green pepper, sliced
1/2 cup cherry tomatoes, cut in half
1/2 tsp. onion powder
1 tsp. cumin
1 tsp. chili powder
1/4 cup water
Soak corn husks in a bowl of water. While husks are soaking, make the masa.
To make the masa, put all dry ingredients in a bowl and stir together. Add water one cup at a time; the masa should be the consistency of thick peanut butter, so add more or less water until the dough looks right. If you add too much water, just add a little more masa flour to even it out. Once the dough is the right consistency, add the canola oil and give it one final stir.
To make the filling, heat the olive oil in a pan over medium heat. Add the onions and salt, and sweat until translucent. Then add the rest of the vegetables and cook for about 5 minutes, stirring occasionally. Then add the spices and water, cover, and reduce the heat; let simmer until veggies are soft, stirring occasionally. Adjust salt and spices as needed.
To make the tamales, put about 2-3 Tbsp. masa into the center of a corn husk. Put a spoonful of the veggie filling on top, then sprinkle with about 1 Tbsp. of cheese. Make sure to leave a bit of room on all sides of the corn husk. Wrap it up like a burrito and tie it with a piece of kitchen string or strip of corn husk.
In a big pot, bring 2 quarts of water to a boil. Pack the tamales tightly into a steamer basket or colander and lower into the pot. Make sure the tamales do not touch the water. Cover and steam for 60-90 minutes. Check the pot periodically to make sure there is still water in the bottom; add more water if it all dries up. After 60 minutes, pull one out and check the masa; it should be firm, but not hard.
Serve with sour cream, lime wedges and salsa.
tamales look amazing! def might have to try it out! i love that you make such ambitious foods. friends and family always think i'm crazy when i make something so out of the ordinary. do you get that too??
ReplyDeleteYes! But I get bored making the same foods all the time, and Matt and I both have a lot of fun trying creative new things...even if they do take 5 hours, haha! Thankfully most of the time everyone enjoys what we make even if they've never had it before, which makes it worth it :) You should def try the tamales if you guys like Mexican, they were so good!
Deletesame here! making something "difficult" and time consuming is the best part of enjoying to cook :) i love mexican...i joke that there must be some mexican in my 100% italian heritage because i love it so much! haha
DeleteHaha, I smell a Mexican themed party in our future... ;-)
DeleteThis was my first time making tamales so the first pot was perfect, but then I fall asleep and woke up from a smell, I couldn't believe it I burnt the pot, so now I dont know what to DC o with the tamales
ReplyDelete