Showing posts with label ReDux. Show all posts

Tuesday, July 22, 2014

Strawberry Rhubarb Crisp (Recipe ReDux)

I've been on the hunt for rhubarb for months now. Growing up in Vermont, we ate it every spring/summer in spades - it was always readily available and we would make rhubarb jam, pies, ice cream sauce, you name it. I even liked to eat it raw dipped in a little sugar. Love the stuff!


If you've never had rhubarb, it looks like large red celery stalks but tastes super tart, almost like a green apple. I like it for its tartness and love a plain rhubarb pie, but it also balances out really well with sweet fruit, which is why you often see it paired with strawberries. When I found it by chance in the ShopRite organic section the other day, I was giddy as a little kid and grabbed a few stalks with no real plan for it, until Sunday. As usual I was last minute on coming up with a ReDux recipe for the month, and as luck would have it, we had plans to have dinner at Matt's parents' house with a bunch of his aunts, uncles and cousins, and I had offered to bring a dessert. Rhubarb, meet berries and sugary crumbs.


This crisp is filled with summer berry sweetness and just a hint of the tart rhubarb, with an extra punch of flavor from some dark rum. It's perfect for a treat on a warm night with a glass of wine sitting by the fire pit. Ah, sweet summer.


 Strawberry Rhubarb Crisp

Serves 6-8

Ingredients
10 oz. rhubarb, cut into chunks (2 large stalks, or about 2 1/2 cups chopped)
4 cups strawberries, chopped
1 cup sugar
1 Tbsp. dark rum
3/4 cup flour
3/4 cup packed brown sugar
1/2 tsp. salt
1 tsp. cinnamon
1 stick cold butter, cubed

Preheat oven to 375.

In a bowl, combine rhubarb, strawberries, sugar and rum. Mix well and set aside.

In a separate bowl, combine flour, brown sugar, salt and cinnamon. Add cubed butter and cut into the flour with a pastry cutter or two knives until the mixture resembles fine bread crumbs (do not overmix or use your hands, or the butter will become too soft).

Add the fruit mixture to an ungreased 8x8 pan, and scatter the flour mixture on top. Bake for about 45 minutes, until topping is browned and fruit is bubbling. Let cool completely so the fruit will set, then top with powdered sugar.


Thursday, May 22, 2014

Chamomile, Pear & Blueberry Smoothie (Recipe ReDux)

I have a new smoothie recipe for you this morning - one with an unexpected ingredient. I'm a huge coffee lover and really enjoy the daily morning ritual of sipping on a hot mug (or these days, iced cold mason jar) of rich dark coffee. But I also enjoy my fair share of tea.


Although I enjoy drinking herbal teas before bed or making all kinds of crazy flavored iced teas for daytime, I honestly never have cooked with tea before. So when I saw that this month's Recipe ReDux theme was about cooking with tea, I was a little stumped. But then it hit me. Why not replace the usual milk or coconut milk in my morning smoothie with some brewed tea instead?


Tea packs a bunch of health benefits, so drinking it in the morning with breakfast can give you a nice boost. This is also a great way to incorporate tea into your diet if you like the idea of tea, or want to get the health benefits, but don't really care for drinking it on its own.


I used chamomile tea in this smoothie, and it added such an interesting herbal, lemony flavor to the smoothie. I have tons of different fruit teas at home so I see more experimentation in my future. Use whatever kind of herbal tea you have on hand and see what you like best!

Chamomile, Pear & Blueberry Smoothie

Makes 1 serving

Ingredients
1 frozen pear (I peeled, chopped and froze mine overnight)
Small handful blueberries
1/2 cup cooled chamomile tea (I also brewed this the night before so it was chilled by morning)
3 Tbsp. plain yogurt
1 tsp. honey

Place all ingredients in a blender and blend until smooth. Enjoy!


Tuesday, April 22, 2014

Quinoa Burgers with Spicy Mayo, Avocado & Arugula

Remember I mentioned I had to do some recipe testing the other day? Well, success was to be had.


This month's Recipe ReDux theme was about using heirloom kitchen tools - things that were passed down to us and that we love to use on a regular basis. I actually don't have any hand-me-downs in my kitchen (a shame, I know), but I do have some favorite tools I grew up with that I've since purchased for myself - pasta maker, wooden spoons (the only kind of spoons I use!), CrockPot, canner...but I have to say the tool I cook with constantly and could never live without, which comes straight from my childhood, is my trusty cast iron skillet. I love it because it cooks at crazy high temperatures, nothing ever sticks to it, it crisps up protein like nobody's business but then also makes nice creamy sauces, and I can sear fish or whatever in it and then finish cooking them in the oven - and they come out perfect every single time. Love, love my cast iron.

I knew I'd be using the cast iron when creating this month's recipe, but I wanted to do something different than my standby seared salmon filet. I have been planning to try making quinoa burgers, AND it was 70 degrees and sunny on Saturday - a perfect day for "burgers" - so that's how the magic started.


Actually it started with cooked quinoa and a whole mess of fresh veggies. The veggies got sautéed in the skillet with some ghee (clarified butter) and seasonings.


Then those veggies were removed from the pan and tossed with cooked quinoa and some other flavorings and then formed into patties. And then those patties were put right back into the same hot cast iron skillet. See, love this pan - I can use the same one for the whole dish. Single dish cleanup! 


Once the patties were cooked, I stored them in a warm oven (in the same pan) to keep warm while Matt and Riker got washed up for dinner. We ate these at the bar with a side of baked carrot fries. It felt like a bar kind of meal.


The patties got topped with a squeeze of fresh lemon, a simple spicy mayo, slices of fresh avocado and a pile of fresh arugula. I didn't use rolls since the quinoa is already a carb, and honestly - with toppings like that, who needs a roll?


The end result was, in Matt's words, "killer." He must've used that word at least three times. I love that kind of kudos at dinner! The burgers were crunchy on the outside but a little soft in the middle, and you could really taste the sweet carrots and red peppers as well as the sharp, salty parmesan cheese. They were perfection. And if the toppings don't strike your fancy, the burgers would be just as good on a bun with a slice of cheese and some ketchup or sriracha sauce.


I will for sure be making them again and again, with all different flavor combos. I think they'd also be fine frozen and then reheated in the toaster oven, so next time I plan to make a big batch and keep extras in the freezer. My new summer jam!

Quinoa Burgers with Spicy Mayo, Avocado & Arugula

Makes about 7 burgers

Ingredients
1 cup quinoa
2 cups water or vegetable broth (if using water, add 1 tsp. salt)
2 tsp. ghee or flavorless oil (like grapeseed)
2 small carrots, minced
1/2 red pepper, chopped
1/2 small onion, minced
1 clove garlic, minced
1/2 tsp. salt
1/2 tsp. pepper
1/8 cup freshly grated parmesan cheese
2 eggs
3 Tbsp. almond flour
2 Tbsp. ghee or flavorless oil (like grapeseed)
Lemon, Spicy Mayo (below), avocado and arugula for toppings

Cook quinoa in broth or water according to package directions. Set aside.

Bring a cast iron skillet to medium/low heat and add the 2 tsp. ghee. Sautee the carrots, red pepper, onion, garlic, salt and pepper for a few minutes, until softened. Remove the veggies from the pan and place in a large mixing bowl.

To the cooked veggies, add the cooked quinoa, parmesan cheese, eggs and almond flour. Mix well. 

Bring the cast iron skillet back up to medium heat and add the 2 Tbsp. ghee. Once the ghee is melted, form the quinoa mixture into patties and place immediately in the pan. Cook about 3-4 minutes each side, until golden brown.

Serve immediately, or keep warm in a low temp oven until ready to serve.

Serve with a squeeze of fresh lemon juice, a light spread of spicy mayo (below), slices of fresh avocado and a handful of arugula (with additional lemon if desired).

Spicy Mayo
1 tsp. fresh lemon juice
1 tsp. salt
1-2 Tbsp. hot sauce, depending on your spice preference


Saturday, April 19, 2014

Dinners Lately

I feel like a farmer's wife this week. A little like Ree from The Pioneer Woman...a husband doing hard manual labor from dawn till dusk every day and me, the wife, handling all childcare, housework and cooking duties. About a month ago I mentioned to Matt how much I really want a nice big patio out back (our current one barely fits our table & grill), and the amazing guy that he is, he jumped in with both feet and gave up his entire spring break this week to work 14-16 hour days in 40 degree weather to build me one. I love this man! In about two weeks, we went from this...


To this...


I'm loving it! It's going to look so beautiful when it's done. I spent some time outdoors today watching him work and envisioning how I'm going to furnish and decorate the whole thing when it's complete. And chasing after Riker who loves to jump in the sand immediately after Matt gets it perfectly smooth and ready to lay pavers down. And snacking.


With Matt working so hard, I've been wanting to make sure he has something tasty and filling to sink his teeth into when he takes his dinner breaks. Of course on the days I work in the city, that hasn't been possible and we've admittedly ordered pizza and Mexican a few times over the last few weeks when I just didn't have time to cook, but for the most part we've had some good home cooked meals.

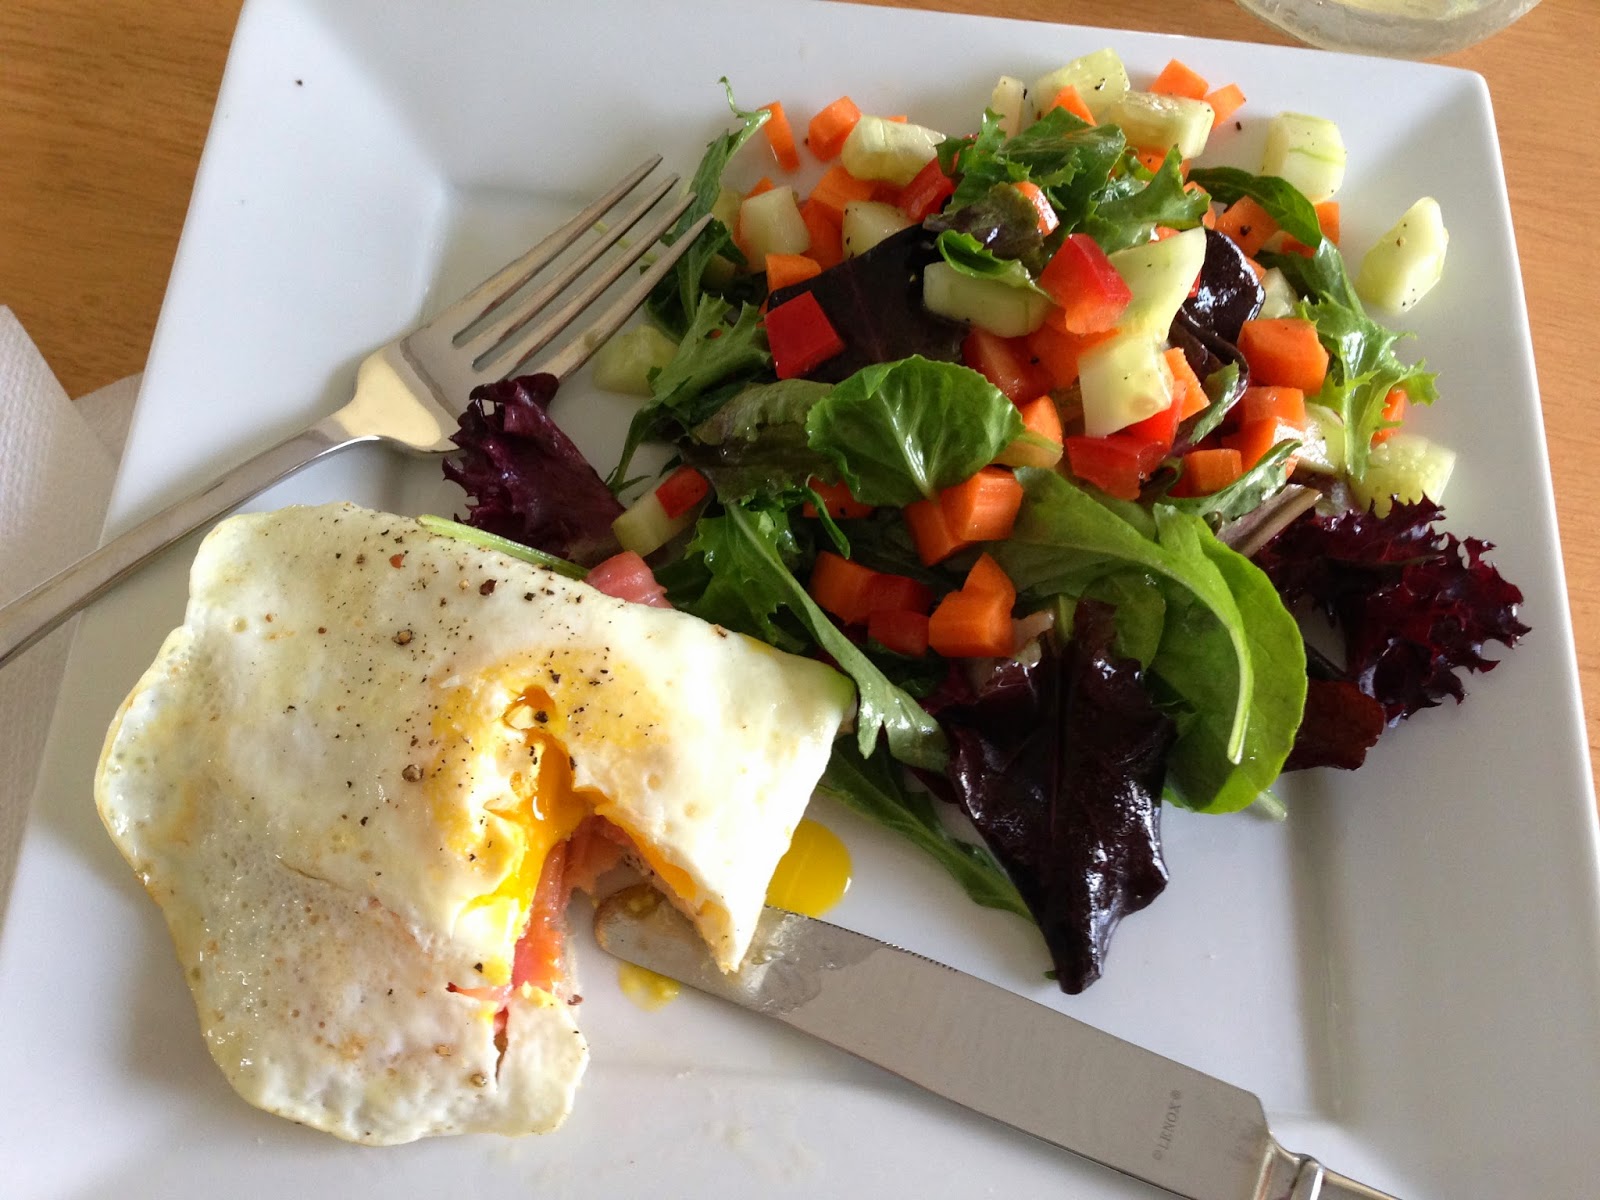
On a warm day, we had lox & fried eggs over Food For Life English muffin halves, with a side of salad with homemade dressing. This is a pretty standard staple around here, we usually eat it once every two weeks.


When it got cold (um, why is it 42 degrees in the middle of April?!), I made a pot of vegetable barley soup. Right before serving, I threw in handfuls of fresh spinach and topped it with fresh parmesan cheese. So warm and hearty.


When creativity escaped me, I took to my Pinterest boards and tried out some recipes that I'd pinned a while back. I actually included these on my meals list for the week to make sure I had the ingredients on hand. 

One of my favorites was Grilled Salmon & Pineapple with Avocado Dressing by Giada DeLaurentiis. I made a few adjustments to her original recipe, but for the most part kept it the same. It was SO good - highly recommend! I'd eat that avocado dressing on just about anything. On the side we had some roasted fingerling potatoes and steamed broccoli from my Door to Door Organics box.


My other favorite Pinterest find of the week was Orange Sesame Tofu from In Jennie's Kitchen - one of my favorite food blogs.


I made a fair amount of adjustments to this recipe too, including adding quinoa and kale to turn it into a full stir-fry meal, but I didn't mess with her sauce. The sauce was so fresh and orangey and just felt bright. Loved it!


But tonight I finally did some real cooking. I totally forgot Recipe ReDux is coming up on Tuesday, and thank goodness I remembered today or I never would've had time to come up with something since tomorrow is Easter and weekdays are just too hard for recipe testing.


We had crunchy quinoa burgers with a side of baked carrot fries. In Matt's words, these were killer. I was glad to give him a fun and delicious dinner as a reprieve to all that brick-laying he's been doing today. I'll be posting the recipe on Tuesday!

Alrighty, time to go put together Easter baskets and relax for the evening. G'night!

Wednesday, March 12, 2014

Broccoli & Blue Greek Yogurt Mac & Cheese

Disclosure: This is a sponsored post. I received a gift card to offset the expense of my ingredients in this recipe. By posting this recipe I am entering a recipe contest sponsored by the California Milk Advisory Board and am eligible to win prizes associated with the contest. I was not compensated for my time.

***

March is National Nutrition Month, a month designated to focus on making healthier food choices for
better overall health and wellness. I do try to make healthy food choices on a daily basis, but when I heard the California Milk Advisory Board (we know them as "Real California Milk") was challenging bloggers to lighten up some of their favorite recipes this month with California dairy products, I got right on board.


Really for three reasons:

1. Cheese. It's delicious. And we all know I eat the stuff at least once a day.
2. I have to admit the Real California Milk commercials crack me up. Like this one.
3. Since I don't eat meat, dairy is a main component of my diet and I get a lot of my protein from milk and yogurt. I drink smoothies or eat a yogurt parfait in a jar almost every weekday morning to get a calcium and protein boost to last me till lunchtime.

I also always keep organic cheese and yogurt snacks on hand for Riker, which he always asks for when he wants a snack - 9 times out of 10 he will ask me for a string cheese when he's hungry, rather than crackers or other typical kid snacks, which makes me happy. So I'm a firm believer in making dairy a part of a healthy diet - at least in our family. (Note: You can grab some great dairy healthy eating tips, family meal planning guides and recipes from HealthyEating.org, the Dairy Council of California's website.)


So back to this recipe. Mac & cheese is a favorite for pretty much everyone, but I don't make it very often because my traditional version is laden with tons of cheese, whole milk, butter, flour...you get it. It's clearly not very healthy and is reserved for special occasions. So I figured it was the perfect dish to lighten up on this challenge.


I swapped out a bunch of the high calorie ingredients for some really flavor-packed, lower fat dairy products that made the mac & cheese really tasty (zingy you might even say) and also creamy even after baked in the oven. 


Since Greek yogurt is already naturally thick, I didn't need to make the traditional roux of butter, flour and milk to thicken the sauce up. And I promise - you don't actually taste yogurt in this. It's just a blank canvas for the cheese and seasonings. 


I used California Monterey Jack & Blue Monterey Jack cheeses, which melt incredibly well and give a nice tangy flavor to the sauce, so you don't need as much cheese as usual. I loved using the California Blue Monterey Jack because it had the flavor of blue cheese but was much more mild than your typical blue cheese. That meant in addition to melting well, it was kid-friendly (Riker loved it).


Add whole wheat pasta and a helping of green veggies, and this is one protein, fiber and vitamin packed dinner all in one bowl. It tastes like comfort food but without all the guilt!

**Note: While I was compensated for the ingredients used in this recipe, as always, all opinions are my own.**

Broccoli & Blue Greek Yogurt Mac & Cheese

Serves 3-4

Ingredients
8 oz. whole wheat pasta
2 cups fresh broccoli florets
5 oz. California Monterey Jack Cheese, grated* 
5 oz. California Blue Monterey Jack Cheese, grated* 
1/2 cup Greek Yogurt (I used 2%)
1/2 tsp. garlic powder
1 1/2 tsp. sea salt
2 tsp. pepper
1 tsp. Dijon mustard
Dash of crushed red pepper flakes
1/2 Tbsp. butter
1/2 cup panko breadcrumbs
1 Tbsp. parmesan cheese

Preheat oven to 400 degrees.

Cook pasta according to package directions. During last two minutes of cooking, add the broccoli florets. Drain the cooked pasta and broccoli, reserving 1/4 of the cooking liquid.

Return the pasta and broccoli to the pot, and add the 1/4 cup cooking liquid and grated cheeses. Turn the the heat on low, and stir together until the cheese is melted. Add the yogurt, garlic powder, salt, pepper, mustard and red pepper flakes. Stir until well combined, then remove from the heat and set aside.

In a small dish, microwave the butter for a few seconds until melted. Add the panko breadcrumbs and parmesan cheese, and stir to combine.

Grease a 1.5 quart baking dish and pour the pasta mixture in. Top with breadcrumb mixture. Bake in the oven uncovered for about 10 minutes, until breadcrumbs are golden brown and cheese is bubbling around the edges.

*I used Sonoma Creamery cheeses. Real California dairy products can be recognized by their seals:


Sunday, February 23, 2014

Strawberry Lime Coconut Cooler


A drink recipe! I’m not sure I’ve ever blogged one of these before, probably because the only things I really drink are water, unsweetened iced tea and coffee. Occasionally I will add lemon, lime or berries to my water, but that’s about it. Once in a while I get an itch for something different so I’ll buy some seltzer water, but after one sip I get hiccups and realize yet again that I don’t like carbonated beverages, and then it’s back to the plain old water.


But today is somehow already time for Recipe ReDux again (actually one day late, but I got no Internet service up in the Poconos, sooo it's coming today), and this month’s theme was all about drinks. Hot, cold, whatever your preference – but something healthy and different. Truth be told, if I wasn’t pregnant, I probably would’ve come up with some fun weekend cocktail. Filled with homemade ginger simple syrup, mint, and maybe some gin. Yep that’s what I could really go for right about now.


But alas, gin could not be had. So I made a fruit drink instead. I actually really like this drink because 1) It’s refreshing and would be great in summer, or makes you think of summer when it’s freezing cold and snowing outside, 2) It’s a great way to hydrate because it’s main liquid is coconut water, which is filled with electrolytes, 3) It’s not plain old water, and 4) It’s also a fun way to consume your afternoon fruit snack when you just can’t look at another apple.


Plus, there is no cooking or muddling or mashing or really even measuring. Just eyeball everything, dump it in a blender and blend away. Serve in a mason jar with a fun straw and for a second feel like you’re in Miami again.


Almost. (And P.S., this would probably be really good with vodka too if you were feelin’ that. Just saying.)

Strawberry Lime Coconut Cooler

Serves 1 (Can easily be multiplied)

Ingredients
1 cup (or 4-5 large) frozen strawberries
¾ cup coconut water (I use Cocozia)
¼ tsp. coconut extract
Juice of ½ a lime
1 tsp. coconut palm sugar
Toasted coconut for garnish (I use Trader Joe’s unsweetened)

Put all ingredients except toasted coconut in blender and blend until smooth, about 1 minute. Pour into glass and garnish with toasted coconut. Enjoy!


Wednesday, January 22, 2014

Goat Cheese Pizza with Brussels Sprouts & Balsamic Reduction (Recipe ReDux)

It's pizza time...


I made this pizza a few weeks ago when we had friends over for football. I figured that was the perfect time to work up an idea for Recipe ReDux, since this month's theme is healthy pizza recipes.


Pizza inherently isn't healthy, with all the dough, cheese and potentially fatty toppings. So this challenge was a great one because I wanted to make a pizza that both tasted great and people wanted to eat, but that was also healthful. And that wasn't just the run-of-the-mill veggie pizza you can get from the local pizza spot.


I think I succeeded with this one.


So to start, I wanted to make a paleo crust that was totally grain-free to cut down on the carb factor in pizza, but I have to say I am a little sick of the cauliflower crust. Every time I make cauliflower crust it tastes good, but really doesn't taste like PIZZA. It doesn't fold right (I don't care what anyone says - and I've tried multiple recipes) and is more like polenta pie than pizza. So I dug around for other ideas and found this one by Zenbelly, which is a yeast base like traditional dough, but uses almond flour and tapioca starch instead of wheat flour. Not being a very adventurous baker, I followed the recipe exactly. I was skeptical, especially when I tried to roll the dough out and it was a sticky mess. But guess what? It WORKED.


It's like real pizza dough. You can even pick it up!


Definitely give this dough recipe a go if you're into low carb living.

So I will admit, this recipe is not 100% my own since I did borrow the dough, but you can choose to use whatever base you like - paleo, cauliflower, whole wheat, your own homemade or one you bought from the grocery store or pizza shop. The real stuff is the toppings.


I started with a base of ricotta cheese, then added a couple big spoonfuls of goat cheese for some tangy flavor. Add shredded Brussels sprouts, parmesan cheese and a drizzle of balsamic reduction, and you've got a flavor explosion. It's a really unique combo of tangy, salty and sweet. You don't really taste the sprouts, but they add a nice crunchy texture against the soft, creamy cheeses.


Note: I had a truffle balsamic reduction on hand since Matt gave me one in my Christmas stocking this year (does he know me, or what?) but if you don't have one in your pantry, you can just take some regular balsamic vinegar and boil it for 15-20 minutes until it reduces down to a thick syrup.

This pizza was a hit with our friends. I only made one, and then made a bunch of regular pies as well, and wish I had made more of this kind. I'll definitely be making it many times over again, probably on both paleo and un-paleo crusts. Maybe even for Superbowl Sunday?

Goat Cheese Pizza with Brussels Sprouts & Balsamic Reduction

Makes 1 pizza

Ingredients
1 pizza dough of your choice (I used this paleo crust)
4 Tbsp. whole milk ricotta cheese
4 oz. goat cheese
Approx. 8-10 fresh Brussels sprouts; halved, cores removed, and shredded
2 Tbsp. parmesan cheese
2-3 Tbsp. balsamic reduction

Preheat oven to 400 degrees. If using a pizza stone, heat the pizza stone as well.

Roll the dough out and place on baking sheet or pizza stone. Bake until almost done - slightly golden on the bottom but not quite cooked on top. Spread the ricotta cheese evenly over the dough; then break up the goat cheese with your fingers and scatter around. Top with shredded Brussels sprouts and parmesan cheese. Drizzle with balsamic reduction. Bake another 3-4 minutes until cheese is hot.

Saturday, December 21, 2013

Tomato, Escarole & Macaroni Soup

Well it's not quite Christmas yet, but it's Recipe ReDux time and this month we're focusing on "lucky foods" for the new year.

I have to admit, when I saw the theme I was a bit perplexed as to what to make. I've never thought of foods as being lucky, so I had to Google around until I found a list of traditionally lucky eats in different cultures. Here's a list if you're interested - I bet some of the things you already eat are on there. There certainly were for me. When I saw "leafy greens" on the list as a lucky food since they resemble money and supposedly can bring prosperity, I knew I'd be cooking greens today. Thankfully I already had a bunch of kale, mesclun greens and escarole in the fridge, because I definitely did not prep ahead for the challenge this month!


This soup comes together in about a half hour and resembles pasta fagioli, but without the beans and sausage you traditionally see. It's brothy, full of escarole and is super hearty without being too filling. Great for a Saturday evening on the couch!

Tomato, Escarole and Macaroni Soup

Serves 3-4

Ingredients
2 Tbsp. olive oil
1 onion, chopped
2 cloves garlic, minced
1 package button mushrooms, sliced
1 head escarole, washed and roughly chopped
1/2 jar organic tomato sauce
3 cups water
1 vegetable bouillon
4 oz. whole wheat macaroni
Dash of crushed red pepper flakes
Salt and pepper, to taste

In a stock pot, saute onions, garlic and mushrooms in the olive oil. Once soft, add the escarole; stir to combine and let cook until escarole wilts down.

Add the tomato sauce, water and bouillon. Bring to a boil, then add the macaroni, red pepper flakes and salt & pepper. Cook for approximately 15 minutes (depending on cooking time of the pasta).

Serve with parmesan cheese on top.